PyQt Hello World
PyQt5 is an influential framework designed for Python enthusiasts aiming to develop GUI applications. This module is expansive with over 620 classes complemented by more than 6000 functions and methods. If you’re seeking a cross-platform GUI toolkit compatible with all major operating systems, including UNIX, Windows, and Mac OS, then PyQt5 is your go-to. Notably, PyQt5 provides developers the flexibility of choosing between a GPL and a commercial license.
Getting Started: How to Install PyQt5
For those acquainted with conda, initiate the PyQt5 installation with:
conda install pyqt
Alternatively, if you prefer pip, simply use:
pip install pyqt5
Recommended Reading: Create Desktop Apps with Python PyQt5
Dive In: Your First PyQt Hello World Application
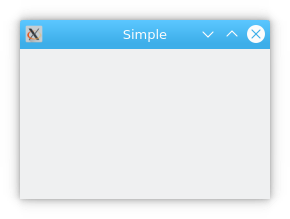
Let’s jump right in with a simple window application:
import sys
from PyQt5.QtWidgets import QApplication, QWidget

if __name__ == '__main__':
    app = QApplication(sys.argv)
    w = QWidget()
    w.resize(250, 150)
    w.move(300, 300)
    w.setWindowTitle('Simple')
    w.show()
    sys.exit(app.exec_())
Breaking Down the Code:
Start by importing necessary modules:
import sys
from PyQt5.QtWidgets import QApplication, QWidget
For every PyQt5 application, it’s imperative to create an application object. The sys.argv parameter is an array of command line arguments; useful when you’re running Python in a shell environment.
app = QApplication(sys.argv)The QWidget object, a foundational UI control in PyQt5, is introduced here. A window is essentially a constructor without a parent.
w = QWidget()With the resize() method, adjust the window dimensions. For instance, here we’re setting the window width at 250px and height at 150px.
w.resize(250, 150)To reposition the control, the move() method comes handy. It’s set to a (300, 300) screen coordinate position. It’s worth noting that screen coordinate’s origin begins at the screen’s top-left corner.
Add a concise title to your window:
w.setWindowTitle('Simple')Lastly, the application’s main loop begins its operation, managing events for the window. The loop persists until the exit() method is triggered or if the main widget gets destroyed. The sys.exit() method ensures a safe termination.
sys.exit(app.exec_())

Enhancing The Basics: Window with Interactive Buttons
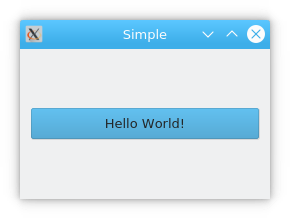
Now, let’s add a layer of interactivity with buttons:
import sys
from PyQt5.QtWidgets import QApplication, QWidget, QPushButton, QHBoxLayout

if __name__ == '__main__':
    app = QApplication(sys.argv)
    w = QWidget()
    layout = QHBoxLayout()
    btn = QPushButton("Hello World!")
    layout.addWidget(btn)
    w.setLayout(layout)
    w.resize(250, 150)
    w.move(300, 300)
    w.setWindowTitle('Simple')
    w.show()
    sys.exit(app.exec_())
Delving Into the Code:
The QHBoxLayout class is introduced to arrange controls horizontally.
layout = QHBoxLayout()Creating a new button becomes a breeze:
btn = QPushButton("Hello World!")By adding the button to the layout, PyQt5 takes care of the alignment:
layout.addWidget(btn)Assign the master layout:
w.setLayout(layout)

Essential Resource: Create Desktop Apps with Python PyQt5
